
Create an Event
At the core of owning a photo booth is creating and running events. With Salsa you can create, edit, and manage events from the comfort of your couch using the Salsa web app and all of them will sync with the Salsa iOS app.
While an event name is all you need to get started, Salsa is packed with tons of features and tools that allow you to create customized experiences for your clients and guests.
Table of Contents
Quick Start
How to Create an Event Walkthrough Video

In this video, you will learn:
How to name an event
Where the event name is displayed
How to use the Event Dashboard
How to change the settings for the event
How to download captures and upload additional captures
Different ways to view event captures
Explainer
What is an Event?
Events are customizable photo booth experiences for capturing, sharing, and displaying photos, GIFs, Boomerangs, and videos.
Events can be ran within the Salsa iOS app or on virtually any computing platform, like laptops and smartphones, using Virtual Booth.
An event typically has three main functionalities:
Capturing images or videos
Sharing captures
Displaying captures
While most events incorporate all three, some might be intended solely for capturing – such as company headshots – or built entirely for displaying captures in a portfolio by using Live Gallery Upload.
All captures are stored within the event from which they were taken and are organized in reverse chronological order. The events themselves are saved to your Salsa account online so they can be accessed from anywhere.
How To
Create a New Event
To create a new event:
Log in to the Salsa web app
Click Create New Event
Enter in a name for your event
Click Create Event
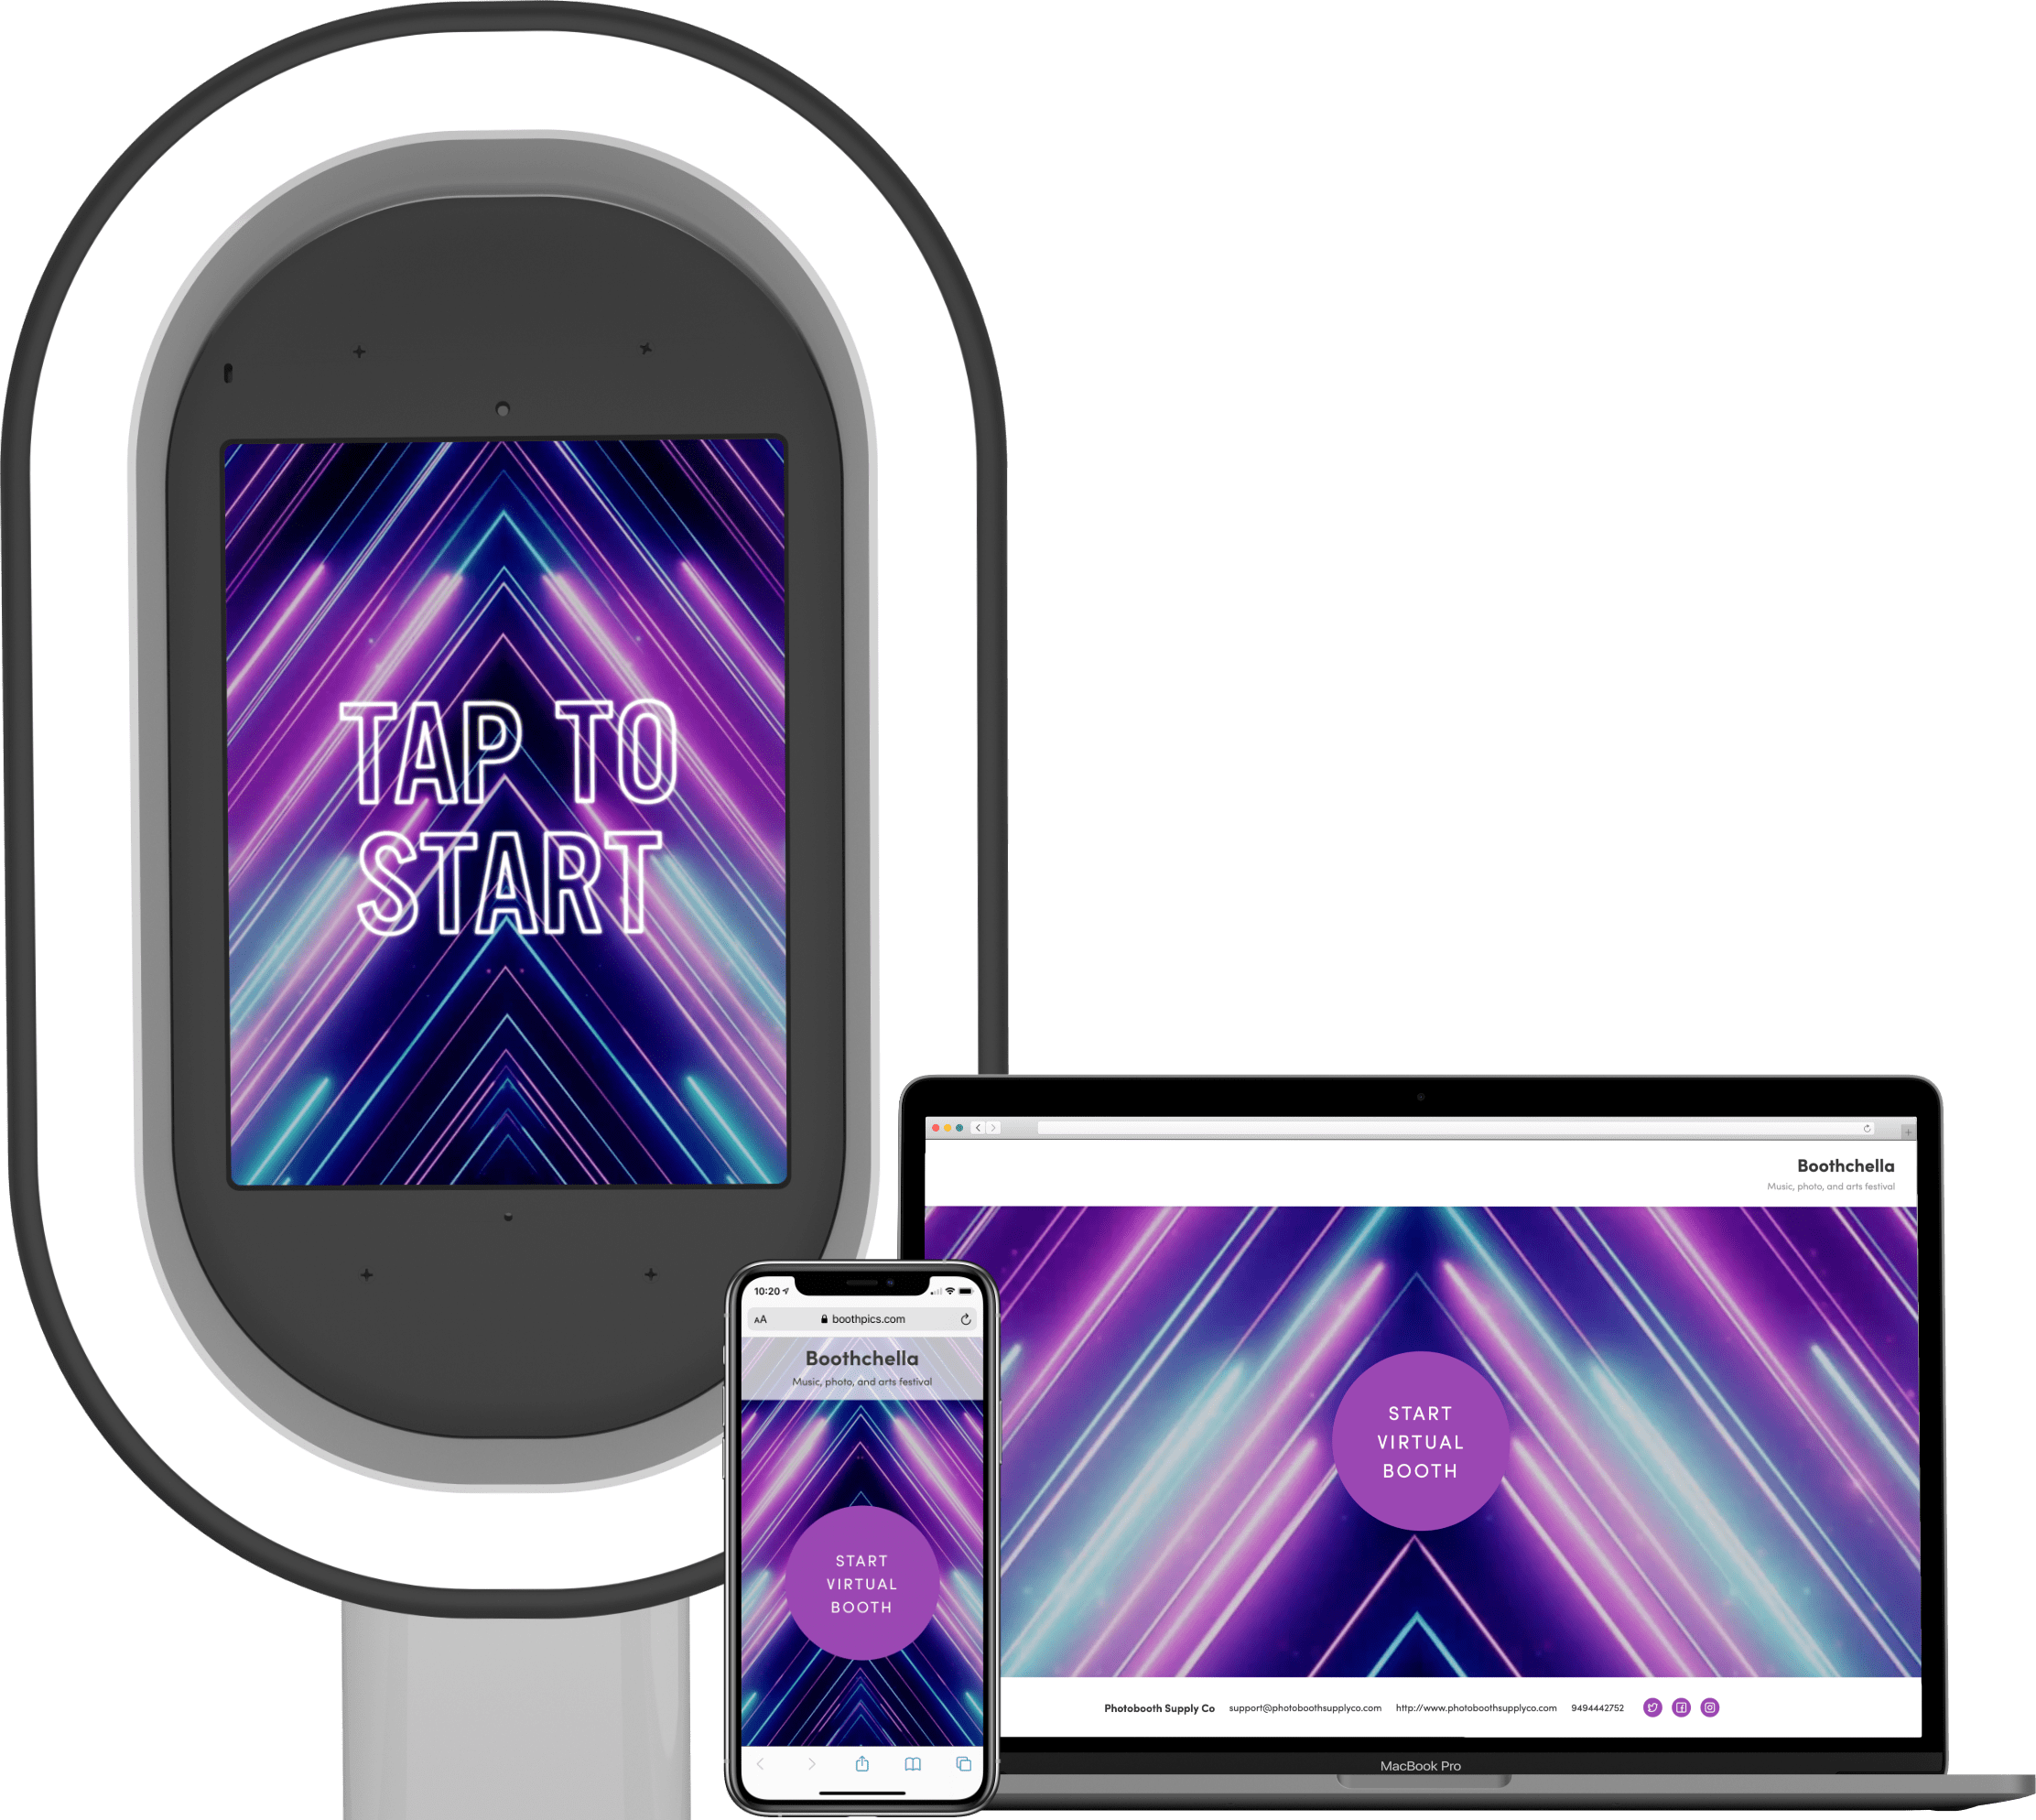
Note: The name of the event will be displayed in various guest-facing places such as the Live Gallery and Virtual Booth. You can always change the name in Event Info within the Event Settings.
How To
Rename Your Event
The name of your event is very important, as this name is displayed in multiple places where guests will be able to see it and identify it including the Live Gallery and Virtual Booth.
An event can be rename before, during, or even after an event. To do this:
Log in to the Salsa web app
Select the event you want to rename
Click Configure Event
Click the Edit Pencil next to the event name
Type in the new name and press enter on your keyboard
How To
Delete an Event

All Salsa subscriptions provide unlimited events and all events are stored online and do not take up room on your iPad.
However, if you ever need to delete an event for any reason you can follow these steps:
Log in to the Salsa web app
Select the event you want to delete
Click Configure Event
Click Delete Event at the bottom of Event Settings
Type in DELETE and click Delete to confirm
Important: Deleting an event is permanent and they cannot be restored. The event’s Live Gallery and Virtual Booth will also be deleted and cannot be restored. All assets added to the event are saved to your Asset Library and will not be deleted.
What To Know
Event Dashboard
The Event Dashboard is the first stop after creating a new event. From here you’ll have access to all of the event captures, the Event Settings and tools, quick links to the Live Gallery and Analytics, and at-a-glance information about the number of captures, shares, and survey responses.
Configure Event
This is where you’ll find all of the Event Settings including Capture Settings, and Sharing Settings
Download & Export
After an event you can use this tool to download or email all of the event captures, a file containing all of your guests email address and phone numbers entered when sharing, and survey statistics
Upload Captures
This tool allows you to upload additional photos and videos to an event and its Live Gallery before, during, or after an event
Quick View Links
Get quick access to the event’s Live Gallery and analytics
What To Know
Event Settings
The Event Settings allow you to customize the overall experience of the event including the Tap To Start Screen and LED lights.
From here you can also design and brand the Live Gallery and turn on Virtual Booth for a hybrid or completely remote event.
The first section of the Event Settings is Event Info where you can make changes to these general settings:
Name: This is the name of your event that is displayed on the Live Gallery and Virtual Booth
Start/End Date: Adjust the date to better organize your events on the All Event screen and provide information to your booth operator or attendant
Location: Add the location of the event to keep track of the information
Enable Passcode: Keeps guests from accidentally leaving the event by requiring a passcode to end the event
Include in Portfolio: Adds the event to your Portfolio
You can adjust other Event Settings by using the options in the left navigation. You can learn more about each setting in the guides below:
What To Know
Event Capture Settings
The Event Capture Settings allow you turn different capture modes on and off, add overlays, and choose what effects are available for guests.
The Modes setting allows you to choose from four different capture types:
Gallery and Sharing Station are not a capture mode, rather they provide guests the ability to view and share previous captures from that event. Gallery and Sharing Station are not available for Virtual Booth.
You can click Edit next to each capture mode to adjust their specific settings.
You can adjust other Event Capture Settings by using the options in the left navigation. You can learn more about each setting in the guides below: